How to Use Camera App in Windows 10: A camera application or App is used to record videos and take photos with the webcam, this application is inbuilt into your Windows 10 PC. To use this camera app is better than to install and use other third-party malware or recording software. In this article, we’ll talk about the use of this camera app and adjusting the various settings. The new interface of Windows 10 is very simple and clean to use. Some of the expected buttons have been removed from the new slick of windows 10, which we expect, and add some extra buttons. For example, there are three other buttons in addition to the picture and video buttons in the new windows 10.
Read Also- How to Open Camera App in Windows 10
Now, if you want to edit, draw, or crop your image then you should go along with the Photos app in Windows 10.
How to Use Camera App in Windows 10
Before we started, you should know that, if you don’t have an in-built webcam or connected to your Windows 10 device then, you’ll see the simple black screen in front of you with the message “We can’t find your camera”. After connecting the camera to your PC, you’ll now get a notification message that will ask you to give permission to use the webcam inside the Camera app.
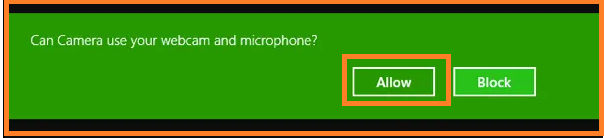
After clicking on the Allow button, you should be able to see your webcam on a full screen with some buttons on the top side and the right side.
If there is a problem in using the camera app, that is, if your webcam is not working with the Windows 10 camera app, however, it is due to the compatibility of the driver to your Windows 10 PC. In that case windows, 10 will not recognize the Webcam present on your system. Now, if you are facing this problem then one thing that you should have to do is, go to the manufacturer’s website and see if they have an updated version of the webcam which is compatible with Windows 10.
How to take a picture or video using the Camera app in Windows 10?
To take a picture just click on the Camera icon to open the Camera App, and for a video, record click on the Video Icon. Doing this, will take a picture or video, and store it in the Camera Roll folder in the Pictures folder. A picture-snapping sound will appear when you click on the icon to take a picture, and then the clicked image is slid off to the bottom right of the screen.
On a tablet device, there is another icon option available, which allows you to take a panoramic picture. You can swipe up this from the bottom of the screen to bring up the app bar, which will give you the option to change the camera (if there is more than one), set the time, change the exposure, etc.
Now, if you want to make a video then, you have to click on the video mode button so that it turns white. Next, click on the button again to start the video. Now, the timer will start, if you want to stop the video, you have to click on it again to stop the video recording.

To adjust the settings, you have to click on the small gear icon on the top right corner. By default, the camera setting is set to take a single photo, and from here you can change it to Photo Burst or Video.
From here, you can pick the resolution of the photo that should be captured, based on your camera. You can also add a framing grid overlay on the camera. There are four choices – Rule of thirds, Golden ratio, Crosshairs, and Square. If you are using a camera on a tablet device then this becomes very useful.
The camera app automatically takes a time-lapse, if you set the timer in the camera app. So, if you set a timer of 10 seconds then, it will keep taking pictures until you press the camera button again. If you are going to record a video then, you can choose the recording quality, which will also depend on the connected camera to your computer. If you have a tablet then please make sure to turn on Digital video stabilization when taking videos.