Turn Off Windows 10 Automatic Updates: If you’re totally fed up with the Automatic Updates of Windows 10, then follow this guide to stop this behavior and decide when to install them. If you are looking for the answer to the question is How to Turn Off Windows 10 Automatic Updates? Then you are in the right place. If your automatic windows updates are not turned off then your PC will consume all the net data in a while. But as per the need for Windows 10, updates are very important.
If we do stop the updation we can lose the features which are linked to it. It can be lost or can be outdated. So this is very important to keep the other features of your computer safe which are associated with the windows 10 updates. If you want to Turn Off Windows 10 Automatic Updates from your PC without any changes in the other features then you have simply followed these steps.
Why do People want to turn off Windows 10 Auto updates?
On our PC, if auto-updates are on, some unusual updates are installed in our PC which is unnecessary and useless for us. These installed updates take up space in our computer and slow down the speed of our system which troubles us when we do any work on it.
If you turned off these updates then you will be able to disable many scheduled tasks and shut some services down. Many of the information or methods generally available on the Internet fail to prevent bug fixing. But in this post, we will tell about the methods that have been successfully tested. With the help of this, you can close your Windows 10 update without any other interruption.
Best 5 Methods to Turn Off Windows 10 Automatic Updates:
- Setting the Metered connection.
- With the help of Services.msc.
- With Gpedit.msc.
- By the Use of Battery Saver Setting.
- By using Regedit.exe.
Method 1: By Setting Metered connection
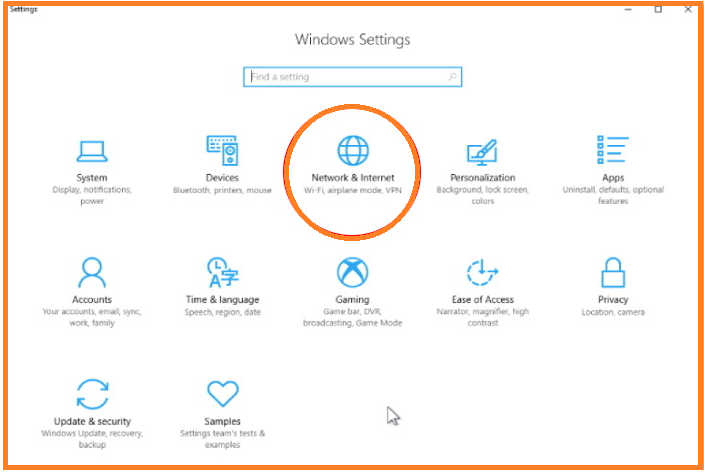
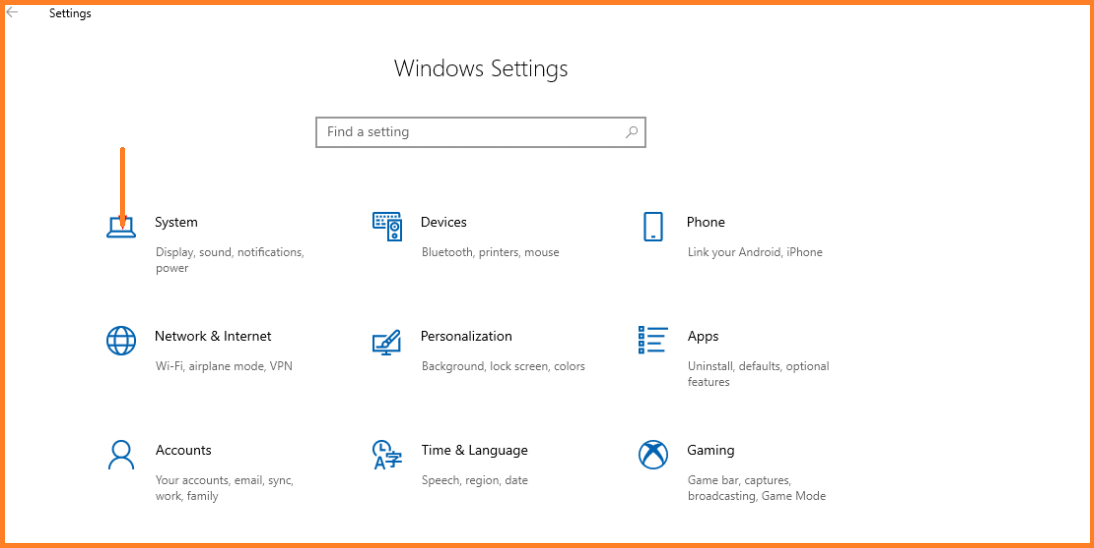
Step 1: Have to Open Windows setting App First.
Step 2: It will appear on the screen and then click on the Network and Internet.
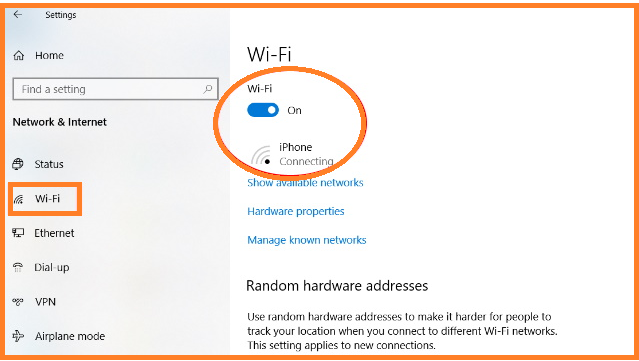
Step 3: Select Wi-Fi and then click on the network name from which you are connected.
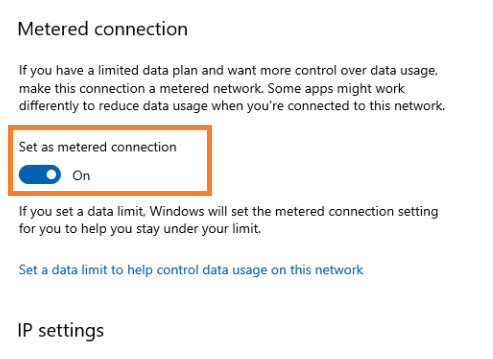
Step 4: Scroll down and turn on the toggle button of Set as a metered connection.
Method 2: Turn Off Windows 10 Automatic Updates with the Help of Services.msc
This is a temporary method, by using this method we can restrict the updates only for a while. You have to follow these steps –
Step 1: First go to the search bar then type services.msc in it and when the result shows up, click on the Enter button on your keyboard.
Step 2: Search for the Windows Update option and when you will find this, make a double click on it.
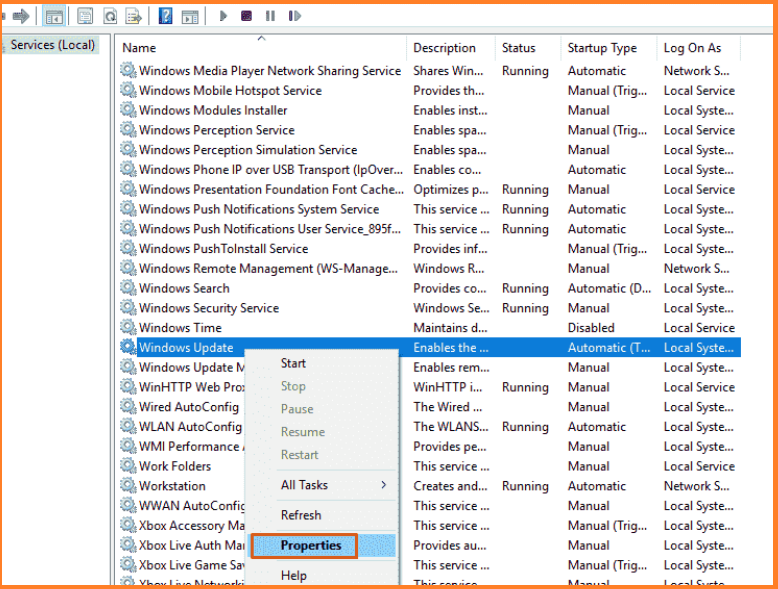
Step 3: Click on the properties.
Step 4: Find the option Disable in the general setting option and then click on it.
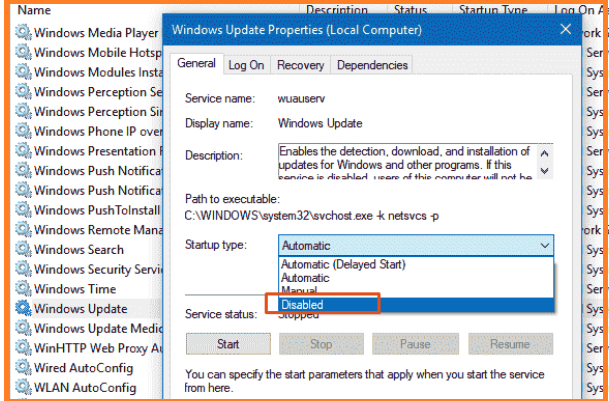
Step 5: Now click on the Apply and then click on the Ok Button.
Method 3: Disable Windows 10 Updates with Gpedit.msc
In the first method, you have learned how to stop updates By Setting Metered connections. But this method won’t work on ethernet connections. In that case, you can choose these steps to stop your auto-updates of Windows 10.
Step 1: Make right-click on the start menu and select Run from the list.
Step 2: Then just type gpedit. msc in the text field and press Enter.
Step 3: Now just find the All Settings option by Navigating.
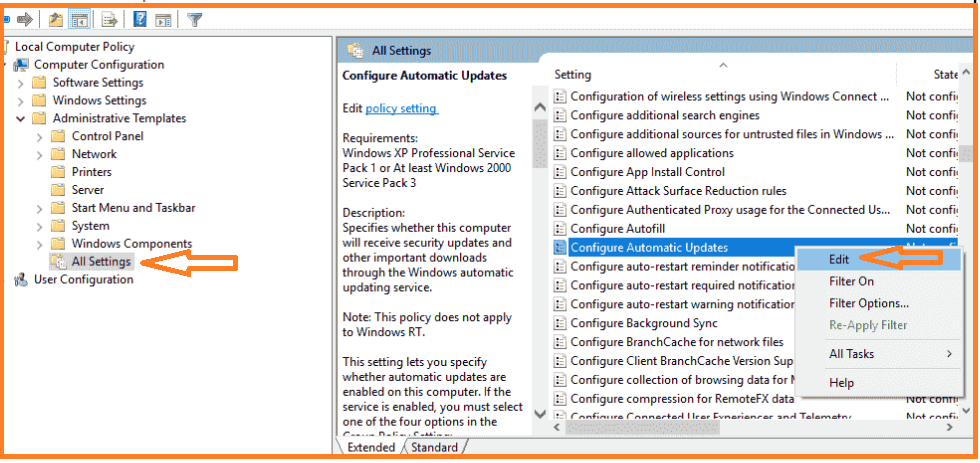
Step 4: Click on the Edit Button.
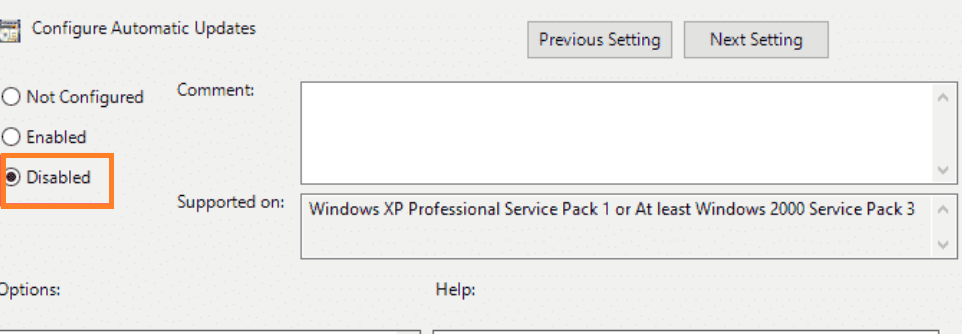
Step 5: Now select the Disable button and click on it.
Step 6: Now finally click on the OK button and then click on Apply.
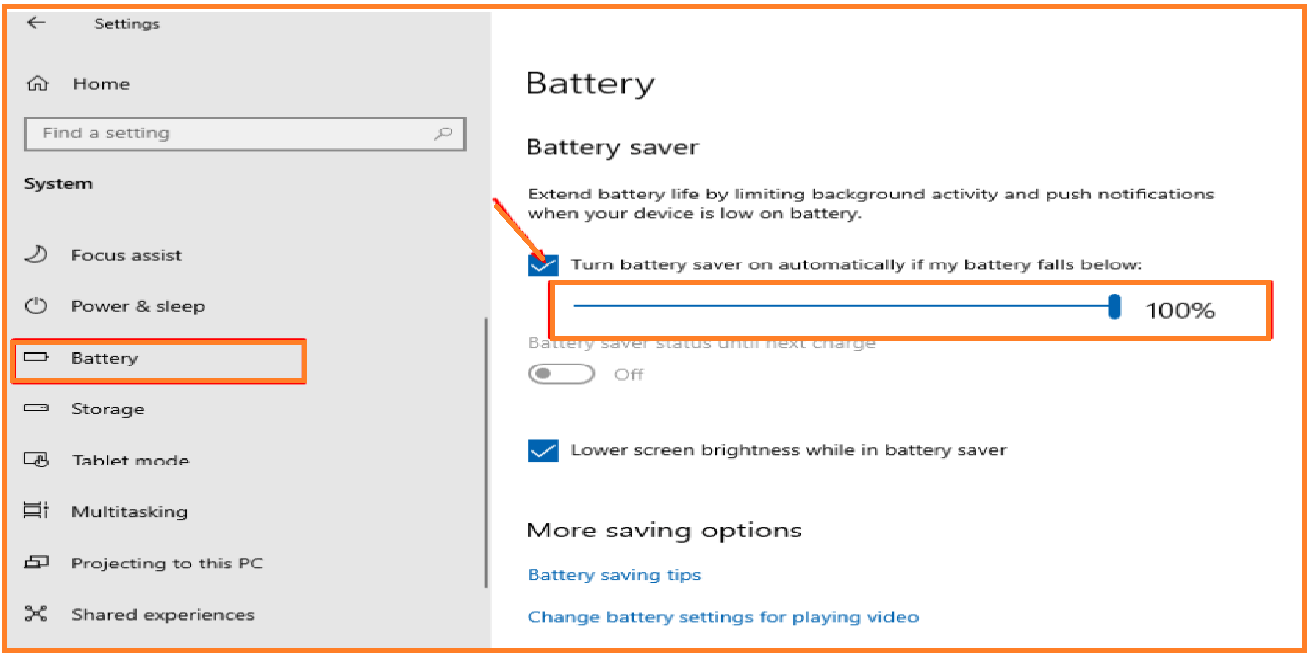
Method 4: Turn off Windows 10 automatic updates By the Use of Battery Saver Setting
- Click on the setting from the start menu.
- Choose the System option.
- Select the Battery option from the left column. Now go to the right and drag the control bar to 100%.
Method 5: By using Regedit.exe
This is the last method of this post and you have to follow the following steps to stop auto-updates of windows 10 on your computer.
Step 1: Click on the search bar and paste egedit.exe and hit the Enter button
Step 2: Copy the following and then paste in the registry key and then hit the enter button.
“HKEY_LOCAL_MACHINE\SOFTWARE\
Policies\Microsoft\Windows”
Step 2: Select Key with the help of the path which is shown in the image.
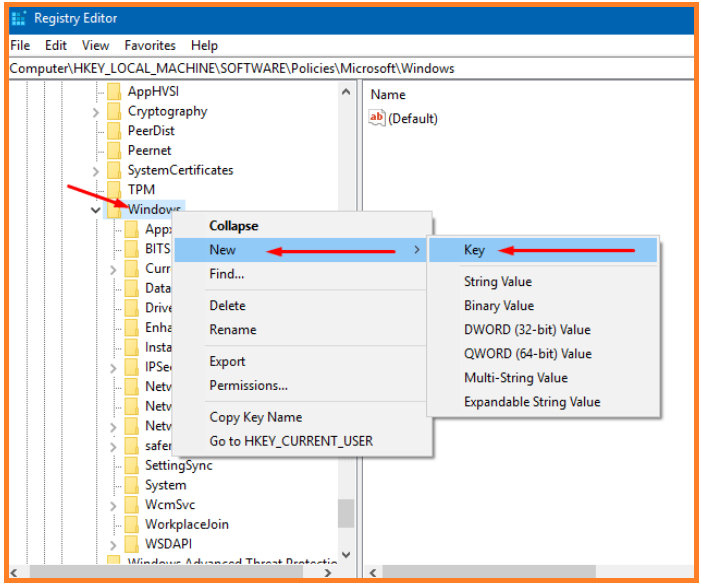
Step-4: Now Give Windows Update as the name of the ‘key’.
Step 5: Make right-click on the ‘Windows update’ and then select New>Key.
Step 6: Now rename this to AU.
Step 7: Select this and make right-click anywhere and then select New > DWORD (32-Bit) Value.
Step 8: Give the name ‘NoAutoUpdate’ to the ‘DWORD’.
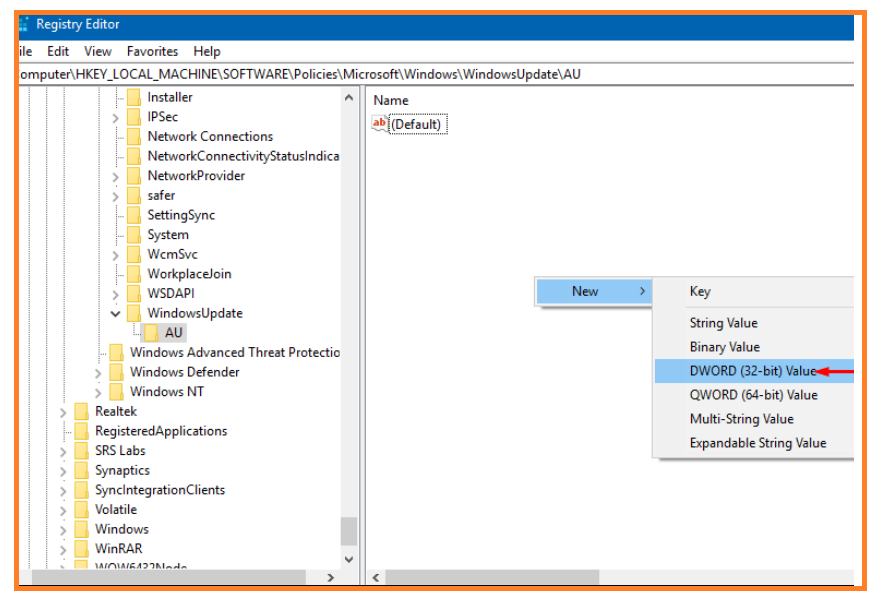
Step-9: Make Double-click on this and enter 1 in the Value data field. Then click OK.
These all are the best possible methods for stopping auto-updates in Windows 10. Hope this post will help you all. Thank you and enjoy reading on this website. We will always be here to solve your problems.
Frequently Asked Questions
How do I stop my computer from updating automatically?
Go to the Start -> Control Panel -> System and Security. Next, under the Windows Update option, click on the “Turn automatic updating on or off” link option. Next, click on the “Change Settings” option presented on the left, verify that the Important Updates option is set to “Never check for updates (not recommended)” and click OK.
Should I turn off Windows 10 updates?
Keep updating your applications and software to prevent many issues and errors. So, we would suggest not turning off updates however, if you are quite sure that you don’t need any updates, you can do this.