
Seeing the “Not enough storage space to install Windows Update” message can be frustrating, especially when Windows keeps telling you that an important update is ready. The good news is that you usually do not need to delete personal files or replace your drive just to make room.
Windows updates need free storage space to download the update, unpack installation files, create temporary files, and complete the installation. In some cases, the amount of space Windows needs can also be larger than the final size of the update itself.
If your Windows 10 or Windows 11 PC is running low on storage, the safest approach is to first find out what is consuming your drive space. Then, remove unnecessary temporary files, uninstall apps you no longer use, move large personal files if necessary, and try Windows Update again.
This guide walks you through the process step by step, so you can free up enough space without accidentally deleting important Windows files.
Not Enough Storage Space to Install Windows Update
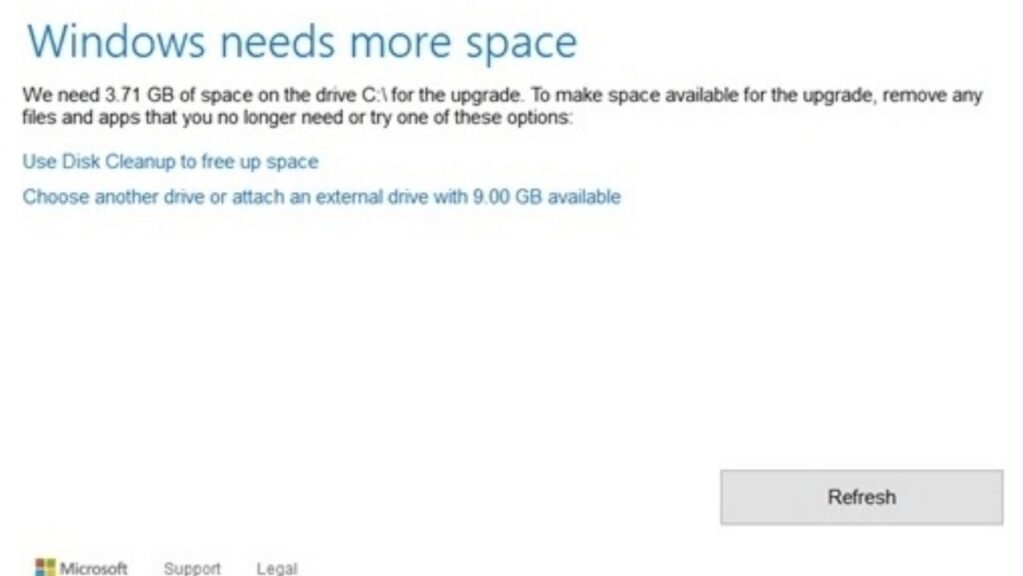
To fix the “Not enough storage space to install Windows Update” error, go to Settings > System > Storage and remove unnecessary temporary files, uninstall unused apps, empty the Recycle Bin, and move large personal files to another drive or cloud storage. After creating enough free space, restart your PC and go to Settings > Windows Update > Check for updates to try the installation again.
The exact amount of free space you need depends on the update and your Windows installation.
Because Windows needs additional working space during the upgrade process, it is better to create more free space than the minimum shown in the error message rather than trying to free only a few extra gigabytes.
Step 1: Check How Much Storage Space You Have
Before deleting anything, check your available storage. This helps you understand whether the problem is caused by a nearly full system drive.
Go to Start > Settings > System > Storage. Windows will display your available storage and show categories such as Installed apps, Temporary files, Documents, Pictures, Videos, and Other.
Look at the drive where Windows is installed, which is usually the C: drive. If it has only a small amount of free space remaining, Windows may not have enough room to download and prepare the update.
Take a moment to look at which category is using the most storage. If Temporary files or Installed apps is taking up a large amount of space, you may be able to recover storage quickly. If your personal folders are responsible for most of the usage, moving large files may be the better option.
Step 2: Remove Temporary Files
Temporary files are one of the easiest places to recover storage because Windows and applications can accumulate them over time.
Go to Settings > System > Storage > Temporary files. Windows will scan your system and display different types of temporary data that can potentially be removed.
Review the available categories carefully. Items such as Temporary files, Delivery Optimization Files, Windows upgrade log files, and Thumbnails may be safe to remove when they are no longer needed.
Be careful with options such as Downloads. Your Downloads folder may contain files you still need, so do not select it simply because Windows lists it as removable.
After selecting the unwanted temporary files, choose Remove files. Depending on how much accumulated data your PC has, this can recover anything from a small amount of space to several gigabytes.
Once the cleanup finishes, return to Settings > System > Storage and check your available space again.
Step 3: Empty the Recycle Bin
Deleting files does not always immediately return their storage space to Windows. Files sent to the Recycle Bin continue using disk space until the bin is emptied.
Go to Desktop > Recycle Bin and review the files inside it. Make sure there is nothing you want to restore. If everything there is safe to remove, select Empty Recycle Bin.
You can also manage this area through Windows storage settings. Go to Settings > System > Storage > Temporary files and review the available cleanup options.
This step is simple, but it can make a noticeable difference if you have recently deleted large videos, installers, ZIP files, or other large documents.
Step 4: Uninstall Apps You No Longer Use
Large applications and games can consume much more storage than you might expect. If your PC has several programs you installed months or years ago and rarely use, uninstalling them can create substantial free space.
Go to Settings > Apps > Installed apps. You will see the applications currently installed on your computer.
Look through the list and identify programs you recognize but no longer need. Windows may also show the approximate size of an application, which makes it easier to find programs consuming significant storage.
Select the three-dot menu next to an unwanted application and choose Uninstall. Follow the application’s removal instructions until the process is complete.
Do not uninstall programs simply because their names look unfamiliar. Some applications are required by Windows, your hardware manufacturer, or another program. If you are unsure what an application does, leave it installed and focus on files you recognize.
Step 5: Move Large Personal Files
If temporary files and unused applications are not enough, your personal files may be taking up most of the available storage.
Go to File Explorer > This PC > Local Disk (C:) > Users > your username. Check folders such as Downloads, Videos, Pictures, and Documents.
Large video files, old installers, archived projects, duplicate files, and high-resolution photos can consume a significant amount of storage.
Instead of permanently deleting files you want to keep, move them to an external USB drive, another internal drive, or a trusted cloud storage service. After confirming that the files have transferred successfully, you can remove the original copies from your C: drive.
Pay particular attention to the Downloads folder. It is common for old installers, compressed files, PDFs, and other downloads to remain there long after they are needed.
Step 6: Use Windows Storage Sense
Windows includes a feature called Storage Sense that can automatically clean certain unnecessary files and help prevent your drive from becoming full again.
Go to Settings > System > Storage > Storage Sense. Turn on Storage Sense if it is currently disabled.
You can review its configuration to understand what Windows is allowed to clean automatically. Storage Sense can help remove temporary files and manage items such as files in the Recycle Bin based on your selected settings.
This is particularly useful if your computer frequently runs low on storage. Instead of waiting until Windows Update fails, Storage Sense can help keep unnecessary data under control.
Step 7: Run Disk Cleanup
Windows also includes the classic Disk Cleanup utility, which can identify additional system files that may be removed.
Go to Start > Search > Disk Cleanup and open the utility. When prompted, select your Windows drive, usually C:.
Disk Cleanup will calculate how much space can potentially be recovered. Review the categories carefully and select the types of files you no longer need.
If available, select Clean up system files. Windows will scan the drive again and may identify additional system-related cleanup items.
Review the results before confirming the cleanup. As with Storage settings, avoid selecting personal folders or files that you still need.
After Disk Cleanup completes, restart your computer. This gives Windows an opportunity to finish pending cleanup operations before you attempt the update again.
Step 8: Restart Your Computer
A restart may seem basic, but it is worth doing after clearing a significant amount of storage.
Select Start > Power > Restart and allow Windows to boot normally.
Restarting can release temporary files that were being held by running applications and can also complete pending system operations. Once the computer starts again, go to Settings > System > Storage and verify that the available space has increased.
If you now have sufficient free storage, try Windows Update again.
Step 9: Try Windows Update Again
Once you have created enough storage, return to Windows Update.
Go to Settings > Windows Update. Select Check for updates and allow Windows to search for available updates.
If the update appears, select Download & install or the corresponding installation option shown on your PC. Keep your computer connected to power if it is a laptop, and avoid shutting down the system while the update is installing.
If Windows still reports that there is not enough space, do not repeatedly restart the installation without freeing additional storage. Go back to Settings > System > Storage and remove more unnecessary data.
Step 10: Run the Windows Update Troubleshooter
If you have created plenty of free space but Windows Update still refuses to install, the issue may not be storage alone.
Go to Settings > System > Troubleshoot > Other troubleshooters. Find Windows Update and select Run.
Windows will check for common update-related problems and may automatically apply certain fixes.
After the troubleshooter finishes, restart your computer and go to Settings > Windows Update > Check for updates again.
If the update continues failing despite having adequate storage, the problem could involve corrupted update components, system files, a pending restart, or another Windows Update issue rather than insufficient disk space.
Faqs
How much free space does Windows Update need?
There is no single amount that applies to every update. The required space depends on the type of update, your Windows version, and your system configuration. Windows may need additional temporary working space during installation, so keeping several extra gigabytes available is a safer approach than meeting the minimum requirement exactly.
Why does Windows say I do not have enough space when I still have free storage?
Windows Update needs more than the final update package size. It may require additional space to download, extract, prepare, install, and roll back update files if something goes wrong. Other temporary Windows files can also consume storage while the update is running.
Can I delete Windows Update files to free space?
Some Windows Update-related files can be safely removed through Windows’ built-in cleanup tools. The safer approach is to use Settings > System > Storage > Temporary files or Disk Cleanup instead of manually deleting system folders.
Should I delete files from the Windows folder?
No. You should not manually delete random files from the Windows folder just to create storage space. Important operating system components are stored there, and deleting the wrong files can cause system instability or other problems.
Can I move my Downloads folder to another drive?
Yes. Moving large personal files from Downloads to another drive can free space on your system drive. Before deleting the originals, verify that the transferred files open correctly and that you have a reliable backup when the files are important.
What if I cannot free enough space?
If your C: drive remains nearly full after removing unnecessary files and applications, consider moving large personal files to an external storage device or another internal drive. If the computer has a very small system drive, upgrading to a larger SSD may eventually be the most practical long-term solution.
Does restarting Windows fix the storage error?
A restart by itself usually does not create a significant amount of storage. However, restarting after cleanup can allow Windows to release temporary resources and complete pending operations. It is a useful step before trying the update again.
Summary
The “Not enough storage space to install Windows Update” message usually means Windows cannot find enough usable space on the system drive to safely prepare and install the update. The best solution is to clean up storage systematically rather than deleting random system files.
Start with Settings > System > Storage to identify what is consuming your drive. Then remove unnecessary temporary files, empty the Recycle Bin, uninstall unused applications, and move large personal files to another storage location. You can also use Storage Sense and Disk Cleanup to recover additional space.
Once you have created enough free storage, restart your computer and go to Settings > Windows Update > Check for updates. If the update still fails even though plenty of storage is available, run the Windows Update troubleshooter and investigate other possible update problems.
Keeping a reasonable amount of free space on your Windows drive is also a good long-term habit. It gives Windows room for updates, temporary files, application data, and normal system operations, reducing the chance of running into the same storage problem again.