
Have you opened Windows Update on your PC and found the message “Your device is missing important security and quality fixes”? If so, you are not alone. This message usually means Windows has not successfully installed one or more important updates that help protect your computer, fix system bugs, and improve overall performance.
The problem can appear on both Windows 11 and Windows 10 computers. Sometimes, Windows Update gets stuck, a required service stops working, or corrupted system files prevent updates from installing correctly. An unstable internet connection, insufficient disk space, or an outdated update component can also cause this issue.
In this guide, you will learn several ways to fix the error, starting with the simplest solutions and moving toward more advanced troubleshooting methods.
Your Device Is Missing Important Security and Quality Fixes in Windows 11/10
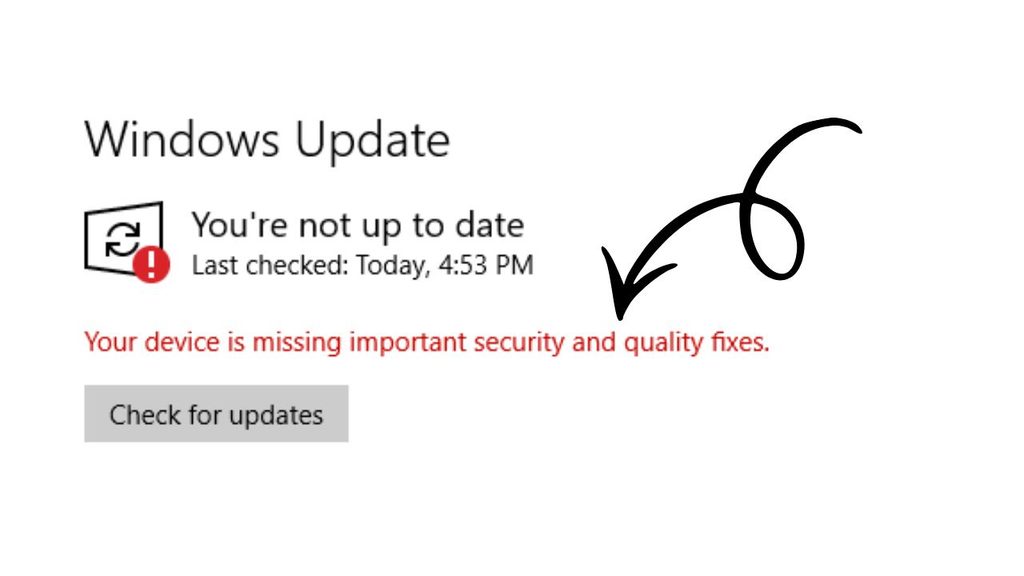
To fix the “Your device is missing important security and quality fixes” message in Windows 11 or Windows 10, follow these steps:
- Restart your computer and check your internet connection.
- Open Windows Update and install all available updates.
- Run the Windows Update troubleshooter.
- Check whether Windows Update services are running.
- Free up disk space on your system drive.
- Repair corrupted system files using the SFC and DISM commands.
- Reset the Windows Update components if the problem continues.
- Install the appropriate update manually if Windows Update still fails.
These steps address common update problems without requiring you to reset your PC.
Step 1: Restart Your Computer and Check Your Internet Connection
Before changing any system settings, restart your computer. This simple action can resolve temporary software glitches, finish pending update operations, and restart services that may not be responding correctly.
Click Start > Power > Restart and wait for Windows to load completely. After signing in, open your browser and check whether websites load normally.
If your internet connection is unstable, restart your router or connect your PC to a reliable network. If you use a VPN or proxy, temporarily disconnect it to check whether it interferes with Windows Update. Only do this if your network permits a direct connection.
Once your connection is stable, check for updates again.
Navigation: Start > Settings > Windows Update > Check for updates in Windows 11.
In Windows 10, go to Start > Settings > Update & Security > Windows Update > Check for updates.
If Windows downloads and installs the pending updates successfully, restart your PC when prompted. Otherwise, continue to the next step.
Step 2: Install All Available Windows Updates
The warning may appear because Windows has detected missing updates that have not been downloaded or installed. Checking for updates manually is an effective way to identify and install them.
On Windows 11, open Settings > Windows Update and select Check for updates. Allow Windows to search for available updates. If updates appear, select Download & install when the option is available.
On Windows 10, open Settings > Update & Security > Windows Update and click Check for updates.
Wait for the installation to finish. Some updates require multiple restarts, so return to Windows Update after restarting and check again.
You can also review Advanced options > Optional updates in Windows 11 or View optional updates in Windows 10, when available. Install relevant driver updates if needed, but avoid installing unrelated drivers simply because they are listed.
Keep in mind that optional updates are not always necessary to resolve this warning. Focus on required security and cumulative updates first.
Windows 10 reached the end of standard support on October 14, 2025. If your PC still runs Windows 10, check whether it qualifies for the Extended Security Updates (ESU) program or whether upgrading to Windows 11 is an option. Eligibility and available updates depend on your device and enrollment status.
Step 3: Run the Windows Update Troubleshooter
Windows includes a troubleshooting tool that can detect and attempt to repair common update-related problems. It is a good choice if the update process repeatedly fails or the same warning returns after restarting.
In Windows 11, open Settings > System > Troubleshoot > Other troubleshooters. Find Windows Update and select Run.
In Windows 10, open Settings > Update & Security > Troubleshoot > Additional troubleshooters. Select Windows Update, then click Run the troubleshooter.
Follow the instructions displayed on your screen. The troubleshooter may identify stopped services, incorrect settings, or other issues affecting updates. Apply any recommended fixes and restart your computer if requested.
Afterward, navigate back to Windows Update and select Check for updates.
If the troubleshooter reports that it could not identify the problem, do not worry. It does not detect every possible cause, so move on to the next method.
Step 4: Check Whether Windows Update Services Are Running
Windows relies on background services to download, prepare, and install updates. If an essential service is disabled or not running when needed, Windows Update may fail.
Press Windows + R to open the Run dialog box. Type services.msc and press Enter.
In the Services window, locate Windows Update. Double-click it to open its properties. Check its current status and startup configuration. If the service is stopped and the Start option is available, select Start.
Windows may manage this service through triggers or other system mechanisms, so it does not necessarily need to remain running all the time. Avoid changing its startup type unnecessarily.
You can also locate Background Intelligent Transfer Service (BITS). This service helps transfer files in the background. If it is stopped, check its configuration and start it if appropriate.
Click Apply > OK if you changed a setting. Restart your PC and try Windows Update again.
Step 5: Free Up Space on Your System Drive
Windows needs sufficient free disk space to download update files, unpack installation packages, and complete servicing operations. If your C: drive is nearly full, updates may fail or remain pending.
Open Settings > System > Storage in Windows 11. In Windows 10, navigate to Settings > System > Storage.
Review the storage breakdown and remove unnecessary temporary files. You can also open Temporary files, review the available categories, and select items you no longer need.
Be careful when selecting Downloads, because this category may contain personal files you want to keep. Back up important documents before deleting anything you are unsure about.
You can also uninstall applications you no longer use or move large personal files to another drive.
After freeing up space, restart your computer and check for updates again. Having adequate free space gives Windows more room to complete the installation process.
Step 6: Repair Corrupted System Files With SFC and DISM
Damaged Windows system files can interfere with updates and trigger recurring errors. Microsoft provides two command-line tools, System File Checker (SFC) and Deployment Image Servicing and Management (DISM), to help repair these problems.
Open Start, search for Command Prompt, right-click it, and select Run as administrator. Approve the User Account Control prompt if it appears.
First, enter the following command and press Enter:
sfc /scannow
Allow the scan to finish. It checks protected Windows system files and attempts to repair corrupted files.
Next, run the following command:
DISM /Online /Cleanup-Image /RestoreHealth
Wait for the operation to complete. DISM may use Windows Update to obtain the files needed for repair, so an internet connection may be necessary. If Windows Update itself is damaged, you may need a compatible repair source.
When DISM finishes, run sfc /scannow again. Restart your PC and check for updates.
Important: Do not close the Command Prompt while either operation is running. Some scans take several minutes or longer, depending on your system.
Step 7: Reset the Windows Update Components
If the previous methods fail, damaged update caches or component-related issues may be preventing Windows from installing updates. Resetting the update components can force Windows to download fresh update files.
First, open Command Prompt as an administrator.
Stop the relevant services by entering these commands individually:
net stop wuauserv
net stop bits
net stop cryptsvc
Some commands may report that a service is not running. If so, continue with the remaining commands.
Next, rename the update cache folders:
ren C:\Windows\SoftwareDistribution SoftwareDistribution.old
ren C:\Windows\System32\catroot2 catroot2.old
Renaming these folders allows Windows to create fresh folders when the services restart. Make sure the commands complete successfully. If Windows reports that a folder is in use, check whether the related services have stopped.
Restart the services:
net start cryptsvc
net start bits
net start wuauserv
Close Command Prompt, restart your computer, and open Windows Update.
Note: Resetting these components can clear the local update download cache and update history display. It does not normally remove installed updates or personal files. If you receive an access-denied or folder-in-use error, do not repeatedly force the operation. Resolve the service or permissions issue first.
Step 8: Install the Required Update Manually
If Windows Update continues to fail, installing the specific missing update manually may help.
Open Windows Update and look for an error code, a failed update name, or a KB number, such as KB50xxxxx. Record the exact identifier.
Visit the official Microsoft Update Catalog and search for that KB number. Choose the package that matches your Windows version, system architecture, and update requirements.
For example, an x64-based Windows installation generally needs the x64 package, while an ARM-based device requires a compatible ARM64 package. Check the update description before downloading it.
Download the appropriate package and run the installer if it is an applicable standalone update. Follow the on-screen instructions and restart your PC if required.
Do not install a package just because its number looks similar. Some updates have prerequisites, are superseded by newer updates, or apply only to specific Windows versions.
After installation, return to Settings > Windows Update and check whether the warning has disappeared.
Step 9: Check Your Windows Version and Support Status
Sometimes, the warning persists because the installed Windows version is outdated or no longer eligible for regular security updates.
Press Windows + R, type winver, and press Enter. The window displays your Windows edition, version, and operating system build.
Compare this information with the supported release information for your edition of Windows. If you use Windows 11, check whether a newer supported feature version is available for your device.
For Windows 10, remember that standard support ended on October 14, 2025. Eligible users may receive security updates through Microsoft’s ESU program, while some specialized editions follow different support timelines.
If Windows Update cannot offer a supported upgrade, verify your hardware compatibility and available upgrade options before making changes.
Keeping Windows on a supported release is important because installing every available update cannot compensate for a version that no longer receives the security coverage you need.
FAQs
1. Why does Windows say my device is missing important security and quality fixes?
This message usually appears when Windows cannot successfully install required updates. Common causes include corrupted update files, stopped services, insufficient storage, damaged system files, or an unsupported Windows version.
2. Can I fix this error without losing my files?
Yes. Most troubleshooting methods, including running the troubleshooter, repairing system files, freeing up storage, and resetting update components, are designed to preserve personal files. Nevertheless, backing up important data before making significant system changes is recommended.
3. Does this message mean my computer has a virus?
No. The message does not automatically indicate a malware infection. It means Windows has detected missing security or quality fixes. If you suspect malware for other reasons, run a scan with Windows Security or a trusted security product.
4. What should I do if Windows Update is stuck at 0%?
Check your internet connection, available disk space, and Windows Update services. Restart your PC and run the Windows Update troubleshooter. If the download remains stuck, repair system files and reset the update components.
5. Will resetting Windows Update delete my installed programs?
Resetting the Windows Update cache generally does not uninstall applications or delete personal documents. However, avoid deleting unrelated system folders or running commands you do not understand.
6. Can I ignore the missing security and quality fixes message?
Ignoring the warning is not recommended. Missing security updates can leave your system exposed to vulnerabilities that newer updates are designed to address. Resolve the issue or confirm that your Windows edition is receiving security updates through an applicable support program.
Final Words
The “Your device is missing important security and quality fixes” message in Windows 11 or Windows 10 can be frustrating, especially when Windows Update refuses to cooperate. Fortunately, you can often resolve it by restarting your PC, installing pending updates, running the troubleshooter, checking essential services, or repairing corrupted system files.
Start with the simpler solutions and move to advanced methods only when necessary. If the issue continues, resetting the Windows Update components or installing the correct update manually may help.
Most importantly, make sure your Windows version is still supported and receiving the security updates applicable to your device.
Keeping your operating system up to date helps protect your personal information, improve system reliability, and maintain a safer computing experience.