
Windows Update is designed to keep your PC secure, stable, and compatible with newer software and hardware. But sometimes an update gets interrupted, fails to install correctly, or conflicts with another system component. When that happens, Windows may display the message “We couldn’t complete the updates. Undoing changes.”
Seeing this message can be frustrating, especially when Windows keeps trying the same update again. The good news is that you can usually fix the problem without resetting your PC or reinstalling Windows.
In this guide, we’ll walk through several beginner-friendly solutions, starting with the simplest fixes and moving toward more advanced Windows repair methods.
Windows Displays “We Couldn’t Complete the Updates.” How to Fix It?
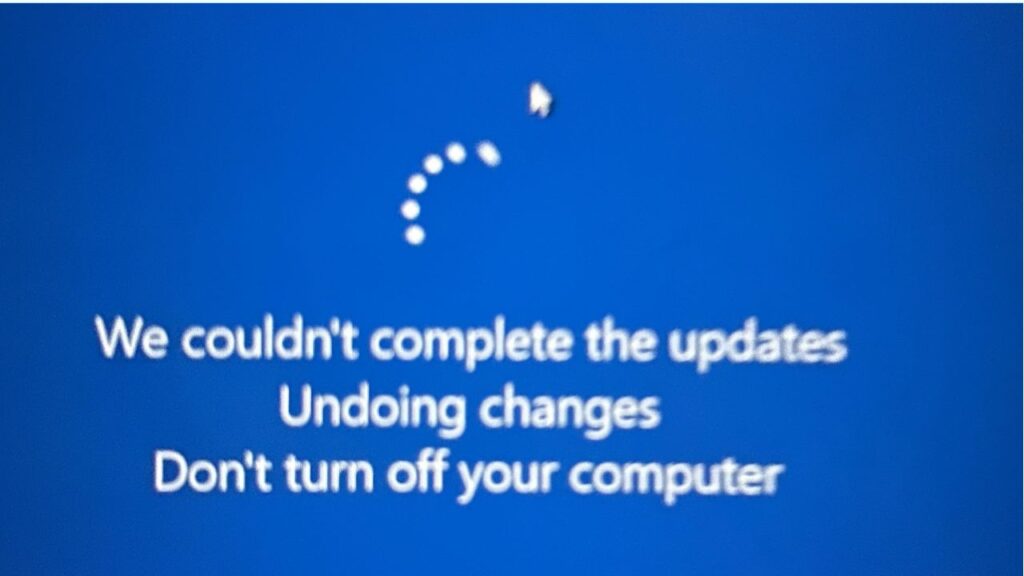
To fix the “We couldn’t complete the updates” error, restart your PC, run the Windows Update troubleshooter, check your available storage, reset the Windows Update components, repair corrupted system files with SFC and DISM, and then try installing the update again. If a particular update continues failing, temporarily uninstalling the most recent update or performing a clean boot can help identify the cause.
The error generally means Windows started installing an update but could not finish the process successfully. Common causes include corrupted Windows Update files, insufficient storage, damaged system files, interrupted update downloads, incompatible drivers, or another background program interfering with the installation.
Let’s go through the fixes one at a time.
Step 1: Restart Your Computer and Try Windows Update Again
Before changing any system settings, give Windows a clean restart. A temporary update process or background service may simply be stuck.
Select Start > Power > Restart and allow Windows to boot normally. Don’t choose Shut down if you’re troubleshooting an update issue, because Restart gives Windows a fresh system session.
Once the desktop appears, go to Settings > Windows Update in Windows 11. In Windows 10, go to Settings > Update & Security > Windows Update. Select Check for updates and allow Windows to search for the update again.
If the update installs successfully, you’re done. If Windows displays “We couldn’t complete the updates” again, continue to the next step.
Step 2: Run the Windows Update Troubleshooter
Windows includes a built-in troubleshooter that can detect common problems with update services and configuration.
On Windows 11, go to Settings > System > Troubleshoot > Other troubleshooters > Windows Update > Run. Follow the instructions shown on the screen and let Windows examine the update system.
On Windows 10, go to Settings > Update & Security > Troubleshoot > Additional troubleshooters > Windows Update > Run the troubleshooter.
The troubleshooter may automatically repair certain configuration problems. When it finishes, restart your PC and go to Settings > Windows Update > Check for updates.
If the troubleshooter says it couldn’t identify a problem, don’t worry. It does not detect every possible cause of a failed update, so continue with the next solution.
Step 3: Make Sure Your PC Has Enough Free Storage
Windows needs sufficient free disk space to download, unpack, and install updates. If your system drive is almost full, an update may fail during installation.
Go to Settings > System > Storage on Windows 11. Review the available storage on your main drive. You can select Temporary files to see which files Windows can safely remove.
On Windows 10, go to Settings > System > Storage and review the storage information.
Remove unnecessary temporary files, old downloads, unused applications, or other files you no longer need. Be careful when deleting personal files, particularly anything stored in Downloads, Documents, Pictures, or Desktop.
After creating some free space, restart your computer and go to Settings > Windows Update > Check for updates.
Step 4: Check Whether Windows Update Services Are Running
Windows Update depends on several background services. If one of these services is stopped or malfunctioning, updates may not install correctly.
Press Windows + R, type services.msc, and press Enter. The Services window will open.
Find Windows Update in the list. Double-click it and check its Service status. If it is stopped, select Start. You can also check the Startup type and make sure it isn’t set to Disabled.
You can also check Background Intelligent Transfer Service (BITS). This service helps Windows transfer update files in the background. Double-click Background Intelligent Transfer Service and make sure the service is available and not disabled.
Close the Services window, restart your computer, and try Windows Update again.
Step 5: Clear the Windows Update Download Cache
Sometimes the update package stored on your computer becomes corrupted. Windows may repeatedly try to use the same damaged files, causing the update to fail again.
To clear this cache, first press Windows + R, type services.msc, and press Enter.
Find Windows Update, right-click it, and select Stop. Then find Background Intelligent Transfer Service, right-click it, and select Stop as well.
Now open File Explorer and go to C:\Windows\SoftwareDistribution. Select the contents inside this folder and delete them. These are temporary Windows Update files, not your personal documents.
If Windows says a file is currently being used, return to Services, make sure Windows Update and BITS are stopped, and try again.
Restart your computer afterward. Windows will recreate the necessary update folders automatically. Then go to Settings > Windows Update > Check for updates and try the installation again.
Step 6: Repair Corrupted Windows System Files
Damaged system files can interfere with Windows Update. Microsoft provides built-in tools called System File Checker, or SFC, and Deployment Image Servicing and Management, or DISM, to repair Windows components.
Press Windows + S, search for Command Prompt, right-click it, and select Run as administrator.
Type the following command and press Enter:
sfc /scannow
Let the scan reach 100 percent. Don’t close the Command Prompt window while the scan is running.
If SFC reports that it found and repaired corrupted files, restart your PC and try Windows Update again.
If the problem continues, open Command Prompt as administrator again and run:
DISM /Online /Cleanup-Image /RestoreHealth
This process can take some time, so don’t interrupt it. When it finishes, restart your computer. Then go to Settings > Windows Update > Check for updates.
Running DISM followed by SFC is particularly useful when Windows components themselves are damaged.
Step 7: Temporarily Disconnect External Devices
Some updates involve hardware drivers, and an attached device can occasionally interfere with installation.
Shut down your computer and disconnect unnecessary USB devices, external storage drives, printers, docking stations, and other peripherals. Keep essential devices such as your keyboard, mouse, and display connected.
Turn the PC back on and go to Settings > Windows Update > Check for updates.
If the update installs successfully, reconnect your devices one at a time. This can help you identify whether a particular peripheral or driver was contributing to the problem.
Step 8: Perform a Clean Boot
If Windows Update works normally until another application starts running, a third-party program or service could be interfering with the installation.
Press Windows + R, type msconfig, and press Enter.
In System Configuration, select the Services tab. Check Hide all Microsoft services, then select Disable all. Next, open the Startup tab and select Open Task Manager.
In Task Manager, disable unnecessary startup applications. Close Task Manager and select OK in System Configuration. Restart the computer.
After restarting, try Settings > Windows Update > Check for updates.
If the update installs in a clean boot environment, a third-party application or service is likely contributing to the problem. After troubleshooting, return to System Configuration and restore your normal startup settings.
Step 9: Uninstall a Recently Installed Update
If the problem began immediately after another Windows update, removing that update may help restore normal operation.
Go to Settings > Windows Update > Update history > Uninstall updates on Windows 11. On Windows 10, go to Settings > Update & Security > Windows Update > View update history > Uninstall updates.
Look for a recently installed update that appeared around the time the problem started. Select it and choose Uninstall if Windows provides that option.
Restart your computer and check Windows Update again.
Don’t randomly remove older security or feature updates. Focus on the update that was installed immediately before the problem appeared, and only remove an update when there is a clear reason to suspect it.
Step 10: Reset Windows Update Components Manually
If Windows Update is still stuck, you can reset its core components using an elevated Command Prompt.
Open Start > search for Command Prompt > right-click Command Prompt > Run as administrator.
Stop the main update services by entering the appropriate commands one at a time:
net stop wuauserv
net stop bits
net stop cryptsvc
Then restart those services:
net start wuauserv
net start bits
net start cryptsvc
Restart Windows and return to Settings > Windows Update. Select Check for updates and try the installation again.
This method can resolve problems where the Windows Update service or its supporting components have become stuck.
Step 11: Check for Driver Problems
A problematic or outdated driver can sometimes cause Windows updates to fail. This is especially worth checking if the update error started after installing new hardware.
Go to Start > Settings > Windows Update > Advanced options > Optional updates > Driver updates. If Windows lists relevant driver updates, review them before installing.
You can also open Start > Device Manager and look for devices displaying a warning symbol. Expand categories such as Display adapters, Network adapters, Sound, video and game controllers, and System devices.
If you recently installed a driver or hardware device, consider whether the timing matches the Windows Update problem. Avoid downloading drivers from unknown websites. Use Windows Update or the hardware manufacturer’s official support software whenever possible.
Step 12: Try Windows Update Again
After completing the repair steps, restart your PC one more time.
Then go to Settings > Windows Update > Check for updates. Keep the computer connected to reliable power and internet while Windows downloads and installs the update.
Don’t force a shutdown while Windows is actively installing an update unless the computer has clearly frozen for an extended period. Interrupting an installation can create additional system problems.
If the update finally completes, open Settings > Windows Update > Update history and verify that the update appears as successfully installed.
FAQs
Why does Windows say “We couldn’t complete the updates”?
Windows can display this message when an update cannot finish installing. Corrupted update files, damaged system components, insufficient storage, driver conflicts, interrupted downloads, and problematic background services are common causes.
Will “We couldn’t complete the updates” damage my computer?
Usually, no. Windows is designed to undo an unsuccessful update installation and return the system to its previous state. However, repeatedly interrupting Windows while it is installing updates can create additional problems, so allow the rollback process to finish whenever possible.
Should I delete the SoftwareDistribution folder?
You can safely delete the contents of the SoftwareDistribution folder after stopping the Windows Update and related services. Windows will recreate the required update files when it checks for updates again.
Can SFC fix Windows Update problems?
SFC can repair corrupted protected Windows system files, which may resolve an update failure when damaged system components are involved. For deeper component-store problems, DISM can also be useful.
What if Windows keeps undoing updates?
If Windows repeatedly installs and then rolls back the same update, work through the troubleshooting steps above, especially clearing the update cache, repairing Windows with DISM and SFC, checking drivers, and performing a clean boot.
Should I reset Windows if an update keeps failing?
A complete Windows reset should generally be a last resort. Most Windows Update failures can be investigated and repaired without removing your applications and personal files.
Summary
The “We couldn’t complete the updates” message usually means Windows encountered a problem while installing an update and automatically rolled the changes back. You don’t necessarily need to reset your PC to solve it.
Start with a simple restart, then run the Windows Update troubleshooter and make sure you have enough free storage. If that doesn’t work, clear the Windows Update cache, verify the required services, and repair corrupted system files with SFC and DISM.
For stubborn cases, disconnect unnecessary devices, perform a clean boot, check recent updates and drivers, or reset the Windows Update components manually. After each major repair, restart your computer and check Settings > Windows Update again.
Working through these solutions in order gives you a practical way to identify the cause without jumping straight to more drastic Windows recovery options.