If you are worried about the Fonts options in your Windows 10 PC and looking for the answer to the question-How to Install Fonts on Windows 10? Or Delete. We would like to tell you that there is a new way in Windows 10 to install and manage fonts right from the settings app. If you want to install fonts for your projects then you can do this easily with the help of this article. You can also remove the fonts which you will never use in the future. So first of all we will learn to install the fonts then after that learn How to delete Fonts on Windows 10.
How to install fonts from the Microsoft Store
You can easily install fonts through the Microsoft store and this is the easiest way to install it. To install fonts using the store you have to follow some simple steps which are given below.

Step 1. Go to the Windows Setting option.
Step 2. Now, click on Personalization, and then click on the Fonts tab.
Note- This option or feature is updated or added in Windows 10’s April 2018 Update. If you are not seeing; this option, that means you have not installed the update yet.
Step 3. Now, Get More Fonts in the Microsoft Store link will appear in front of you. By clicking on this link, go to the new font section in the Microsoft store application. In this list, both free, as well as paid fonts present. You can install which you want to install. To install the fonts- just click on the fonts and then click on the “Get” button to download it.
Step 4. After downloading the selected fonts, they may or may not be packed in a zip file. If it is zipped, then do a right-click and extract these all fonts in the folder where you wanted to extract and install.
Step 5. Now, after the extraction, choose the files and then make a right click and click on the install option to install them.
How to install fonts using drag and drop Option
You can choose this simple drag and drop method to install the fonts on your Windows 10 PC. In this method, you can install the fonts by using drag & drop: this method needs two open windows. Steps to do this are given below.
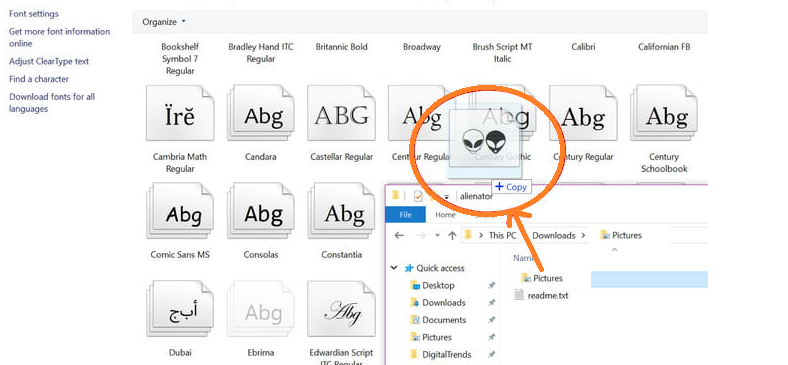
Step 1. As we instructed above, to extract the files from the zip folder, Download your font, extract it from its zip file if required.
Step 2. Now, go to the taskbar and type the Control panel in the search box.
Step 3. The control panel will open, navigate to Appearance and Personalization, and then click on Fonts in the main window.
Step 4. After downloading your font library, drag the new font from the destination location in File Explorer into the Font window. You will see the progress bar, and when it completes, you can use your installed fonts now.
You can also install your fonts by drag and drop using the setting menu. Open the Settings menu, navigate to the Fonts section of the Personalization menu, then drag your font files over to the dotted rectangle underneath Add Fonts.
How to delete Fonts on Windows 10
Please follow the below instructions to delete the fonts from your Windows 10 PC.
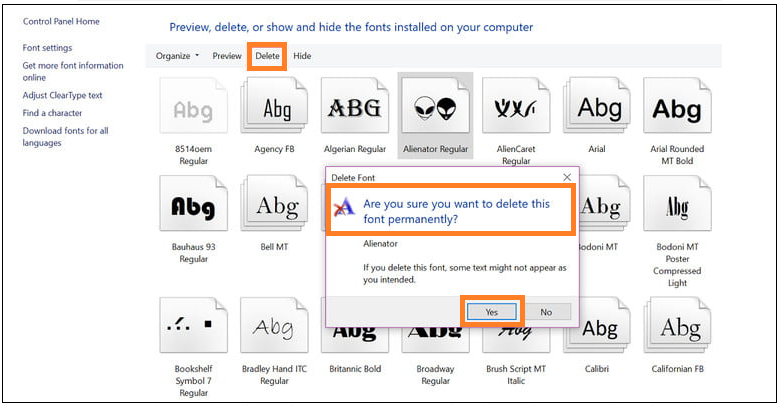
Step 1. Type control panel after opening the Windows search bar and hit the Enter button.
Step 2. Now, Choose Appearance and Personalization, followed by Fonts.
Step 3. Now, scroll down to choose the font which you want to delete from your system. After; selecting the font, click on it and then choose the Delete option from the Top Bar menu. You can also choose the delete option by pressing right-click on the font and the popup menu.
Step 4. Now, a confirmation popup will open and will ask you to confirm that you are sure to delete the font, press- the Yes button.
This is all about How to Install or Delete Fonts in Windows 10 device. Hope ! this will help you. If you have any other queries related to your PC, you can ask us in the comment section we will try to resolve that as soon as possible. Thanks…