Zoom requires passcodes for any meeting and webinar. Zoom does this to protect the user’s data. So if you want to join a meeting then the passcode and the waiting room should be enabled. If you don’t have any idea how to do this, then we are going to discuss How to Enable the Passcode and Waiting Room in Zoom in this guide.
Sometimes, users face Zoom errors, if they don’t enable passcodes and waiting rooms before joining a meeting using Zoom. So this becomes very important to all to know how you can enable them if these are disabled.
How to Enable Passcode and Waiting Room in Zoom
Here are the steps to enable the Passcode Waiting room in Zoom.
How to Enable Passcode in Zoom
To enable Passcode in Zoom, you have to log in to your account first, after that, follow these steps.
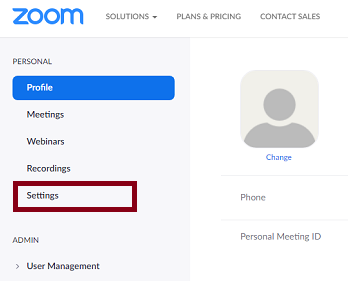
- Navigate the “Settings” option from the left side of the screen and click on this option.
- Once you click on this option a new window will open with four sections i.e.- Meeting, Recording, Telephone, and Collaboration Devices.
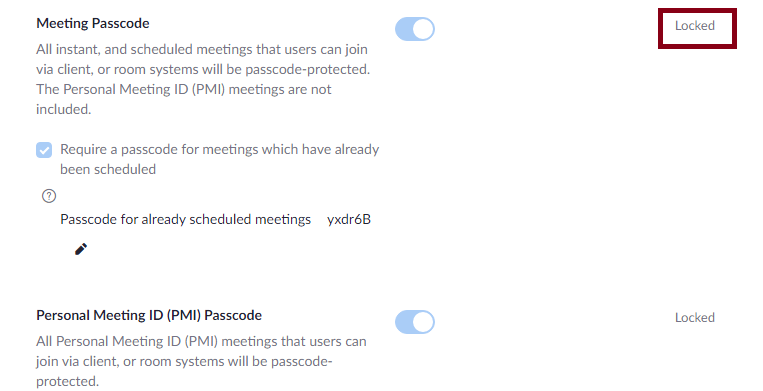
- Under the Meeting section, when you scroll down, you will get a toggle button in front of the text- “Meeting Passcode”, Click on this toggle button to enable the passcode.
You will be asked for confirmation, Click on the “Turn On” option, and the passcode will be enabled.
Note: This option is available to all to disable if this hasn’t been locked by the admin.
How to Enable Waiting Room in Zoom
To enable the waiting room in Zoom, follow the starting two steps from the above method, then the steps given below.
- Now under the “Meeting” section and security option, you will see a toggle button in front of the text- “Waiting Room”, Click on this toggle.
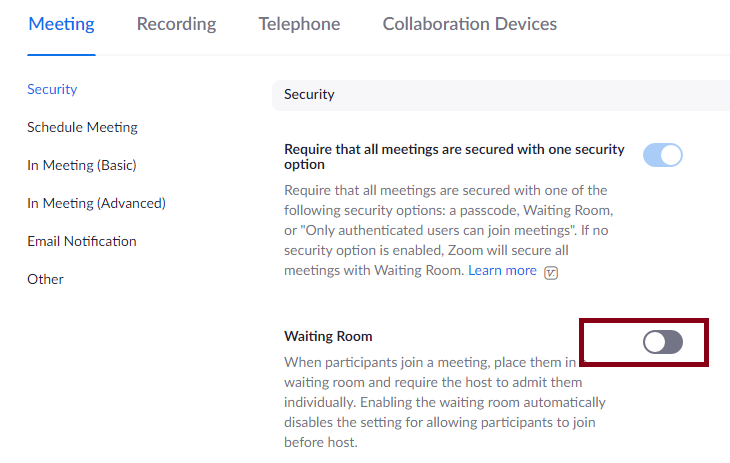
- After this, the waiting room will be enabled.
That’s all about How to Enable the Passcode and Waiting Room in Zoom. Hope this will help you to enable these both to join the meetings and prevent errors. Thanks…