Enable or Disable Camera in Windows 10: You all know that Camera is an in-built application in all Windows 10 which allows you to take photos and record videos. If you are also a windows 10 user and looking for the answer to the question- How to Enable or Disable webcam in Windows 10? Then this tutorial is for you. Nowadays, mostly tablets and laptops are coming with integrated cameras in them to do video chat or take a picture, or record a video. Some users, because of their security norms, want to disable the camera or webcam from their system. In this guide, we will show you the methods by which you can easily Enable or disable;e your camera from your Windows 10 PC.
There can be many methods, but, in this article, we are going to show you two very easy and very simple methods to Enable or disable the Camera from your Windows 10 PC. Here are these two methods and we’ll discuss them one by one.
Enable or Disable Camera or webcam in Windows 10
Method 1- Enable or Disable Camera Using Device Manager.
Method 2- Enable or Disable Camera Using Windows 10 Settings.
So, let’s start with step one, first.
Method 1- Enable or Disable Camera Using Device Manager.
Through this method, you can completely disable your camera. To disable completely your camera please follow the following steps:
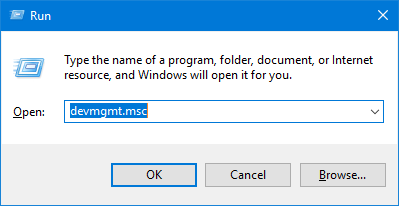
Step 1. Press “Windows + R” together to open the Run dialog box.
Step 2. Now, just copy-paste the given text into the search area.
devmgmt.msc
Step 3. Now, hit the Enter button.
Step 4. Now, the device manager window will open, Click, imaging devices to expand it and display your camera. Now, make a right-click on the selected camera and then press “Disable”. Here, you may be asked for the confirmation then click on Yes to confirm.

Step 5. Now, your camera will be turned off. In the future, if you need to enable it just repeat the above process but select the Enable option.
Method 2. Enable or Disable Camera Using Windows 10 Settings
Please follow the steps which are given below to disable your Camera from your Windows 10 PC.
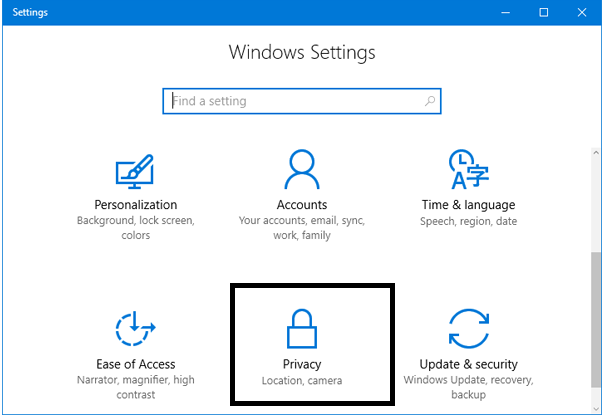
Step 1. Press the “Windows +I” key together to open the Setting. You can also click on the Setting icon from the Start menu.
Step 2. Now, click on the privacy option from the setting window.
Step 3. After pressing on the Privacy option, a new window will open. Now, from the left-side choose the camera then- you will see the option “Let apps use my camera” on the right-side. Here, you can toggle OFF or ON to prevent all apps from accessing your camera.
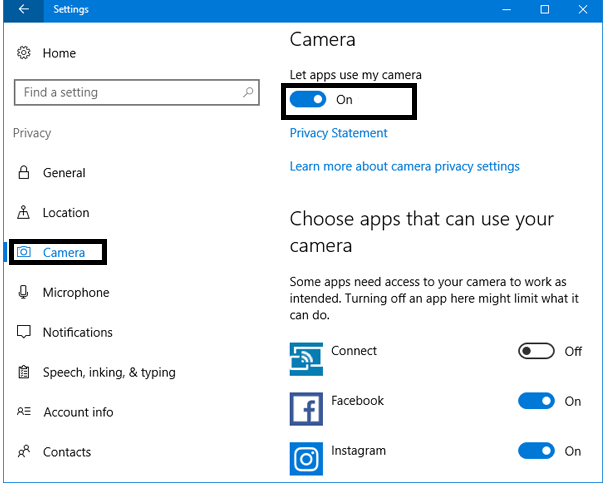
That’s all.