
ERR_NETWORK_CHANGED error usually means your browser detected a change in the network connection while trying to load a webpage. This can happen when you switch between Wi-Fi networks, reconnect your router, use a VPN, or experience a problem with your network adapter.
Sometimes, outdated drivers, incorrect DNS settings, or corrupted browser data can also contribute to the issue.
In this guide, you’ll learn how to fix ERR_NETWORK_CHANGED in Chrome and Edge on Windows 11 and Windows 10.
Fix ERR_NETWORK_CHANGED in Chrome and Edge Browsers
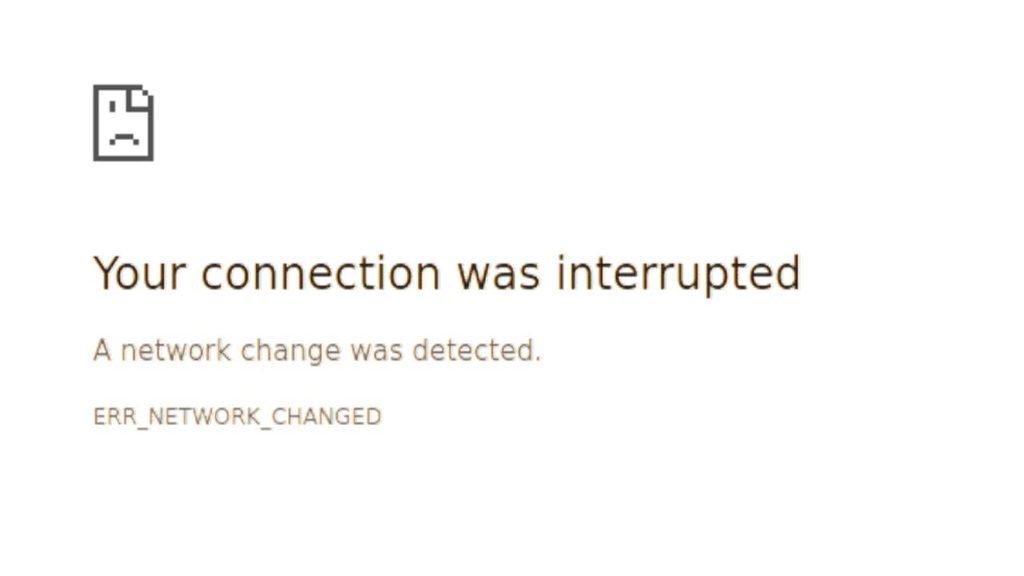
To fix the ERR_NETWORK_CHANGED error in Chrome and Edge, try these steps:
- Refresh the webpage and restart your browser.
- Restart your router and check your internet connection.
- Disable your VPN or proxy temporarily.
- Clear your browser’s cached data.
- Flush the DNS cache using Command Prompt.
- Reset Winsock and the TCP/IP network configuration.
- Update your network adapter driver.
- Change your DNS server if the problem continues.
- Reset Windows network settings as a last resort.
These solutions address common connection interruptions in both browsers. You don’t need to complete every step if an earlier solution fixes the problem.
Step 1: Refresh the Webpage and Restart Your Browser
Start with the simplest solution. Sometimes, Chrome or Edge detects a temporary network interruption while loading a website. Refreshing the page or restarting the browser may be enough to resolve the error.
Open the affected webpage and press Ctrl + R to reload it. You can also click the refresh icon beside the address bar.
If the error appears again, close the browser completely and reopen it. Make sure all browser windows have closed before launching it again.
Next, visit a few different websites. If only one webpage displays the error, the issue may be related to that website rather than your entire internet connection.
Navigation: Chrome or Edge > Open the affected webpage > Ctrl + R > Test another website.
If several websites fail to load, continue to the next step.
Step 2: Restart Your Router and Check Your Internet Connection
A temporary interruption in your router or modem can cause your browser to detect a network change. Restarting your network equipment can help restore a stable connection.
First, save your online work and disconnect any downloads in progress. Turn off your router using its power button, or unplug its power cable if the manufacturer recommends that method. Wait about 30 seconds, then reconnect the power and allow the router to finish starting up.
Reconnect your computer to the network and open Chrome or Edge. Try loading the affected webpage again.
You should also check whether other devices connected to the same network can access the internet. If every device has trouble connecting, the problem may involve your router, modem, or internet service provider.
If other devices work normally but your PC continues to display ERR_NETWORK_CHANGED, the problem may be related to Windows or your computer’s network configuration.
Step 3: Disable Your VPN or Proxy Temporarily
A VPN or proxy changes how your computer connects to websites. If the connection drops, the VPN server changes, or the proxy settings are incorrect, Chrome and Edge may report a network change.
If you’re using a VPN, disconnect it temporarily and reload the affected webpage. If the error disappears, reconnect the VPN and check whether the problem returns.
You can also review your proxy settings in Windows.
On Windows 11, navigate to Settings > Network & internet > Proxy.
On Windows 10, open Settings > Network & Internet > Proxy.
Review the available options and check whether a proxy server has been configured. If you set it up yourself and no longer need it, you can turn it off temporarily for testing.
Important: Don’t disable a VPN or change proxy settings on a managed work or school computer without permission. These settings may be required by your organization. Restore any settings you need after troubleshooting.
Step 4: Clear the Browser’s Cached Data
Chrome and Edge store temporary website files to make browsing faster. Although cached data is useful, outdated or corrupted files can sometimes interfere with website loading.
In Google Chrome, press Ctrl + Shift + Delete to open the Clear browsing data window. Select an appropriate time range, such as All time, and check Cached images and files.
In Microsoft Edge, press Ctrl + Shift + Delete and select Cached images and files in the corresponding window.
Click Delete data or Clear now, depending on the browser.
For this test, you generally don’t need to select saved passwords or autofill information. Deleting cookies may sign you out of websites, so leave that category unchecked unless you specifically want to clear it.
Close and reopen the browser, then visit the affected webpage.
If the error persists, the issue is more likely related to your network connection or Windows configuration than the browser cache alone.
Step 5: Flush the DNS Cache
Windows maintains a local DNS cache that stores information used to translate website names into IP addresses. If this information becomes outdated or inconsistent, you may experience connection problems.
Flushing the cache clears these locally stored DNS records so Windows can request fresh information when needed.
Click Start, search for Command Prompt, right-click it, and select Run as administrator. Approve the permission prompt if it appears.
Enter the following command and press Enter:
ipconfig /flushdns
Windows should display a message confirming that the DNS Resolver Cache was successfully flushed.
Close Command Prompt and reopen Chrome or Edge. Try accessing the website again.
If the command completes successfully but the error remains, continue with the next step. Flushing DNS addresses only one possible cause, so it may not resolve problems involving your router, network adapter, or connection itself.
Step 6: Reset Winsock and the TCP/IP Configuration
If flushing DNS doesn’t help, Windows networking components may be experiencing a configuration problem. Winsock manages communication between network applications and network services, while TCP/IP provides essential networking functions.
Resetting these components can help resolve certain connection errors.
Open Command Prompt as an administrator, then enter the following command:
netsh winsock reset
Press Enter and wait for the confirmation message.
Next, enter:
netsh int ip reset
Press Enter again and allow the command to finish. Restart your computer to apply the changes.
After Windows starts, reconnect to your network and test Chrome and Edge.
Keep in mind that resetting networking components can affect custom network configurations. If you use a static IP address, specialized DNS settings, or a managed network, make sure you know how to restore those settings before proceeding.
If the error continues, check the network adapter itself.
Step 7: Update Your Network Adapter Driver
An outdated, corrupted, or incompatible network adapter driver can cause connection interruptions. Updating the driver may help if the problem started after a Windows update, driver change, or hardware modification.
Press Windows + X and select Device Manager. Expand Network adapters to view the network devices installed on your computer.
Identify the adapter you use for your internet connection. It may have a name associated with Intel, Realtek, Qualcomm, or another manufacturer.
Right-click the adapter and select Update driver > Search automatically for drivers.
If Windows finds a suitable driver, follow the instructions to install it. Restart your computer afterward and check whether the error has disappeared.
If Windows reports that the best driver is already installed, you can check the computer manufacturer’s support page for a newer driver that matches your exact model and Windows version.
Avoid downloading drivers from unfamiliar websites. If the error began immediately after a driver update, open the adapter’s Properties > Driver tab and check whether Roll Back Driver is available.
Step 8: Change Your DNS Server
Your internet connection may work while DNS requests fail or respond inconsistently. Switching to a reliable DNS provider can help determine whether the configured DNS server is contributing to the problem.
On Windows 11, open Settings > Network & internet and select your active Wi-Fi or Ethernet connection. Find the DNS server assignment settings and select Edit.
On Windows 10, open Settings > Network & Internet > Change adapter options. Right-click your active network connection, select Properties, choose Internet Protocol Version 4 (TCP/IPv4), and click Properties.
If you decide to use a public DNS provider, enter its verified IPv4 addresses in the appropriate fields. For example, Google’s public DNS uses 8.8.8.8 and 8.8.4.4.
Save the changes and reconnect to your network if necessary. Then reopen Chrome or Edge and test the website.
If the problem doesn’t improve, restore your previous DNS settings, particularly if your network administrator or internet provider requires specific DNS servers.
Step 9: Reset Windows Network Settings
If the previous methods fail, a Windows network reset may help resolve deeper configuration problems. Use this option only after trying the less disruptive solutions.
In Windows 11, open Settings > Network & internet > Advanced network settings > Network reset.
In Windows 10, navigate to Settings > Network & Internet > Status > Network reset.
Select Reset now and confirm the action. Windows will restart your computer as part of the process or prompt you to restart.
A network reset removes and reinstalls network adapters and restores their settings to default values. You may need to reconnect to Wi-Fi, reconfigure network settings, or reinstall certain networking software afterward.
If you use a VPN client, virtual machine networking, or custom network configuration, be prepared to set it up again.
After the reset, connect to the internet and test the browsers. If the error remains across multiple devices or networks, contact your internet service provider or network administrator to investigate further.
FAQs
1. What does ERR_NETWORK_CHANGED mean in Chrome and Edge?
The error means the browser detected a change in the network connection while loading a webpage. Common causes include Wi-Fi interruptions, VPN changes, DNS problems, router issues, or network adapter errors.
2. Why does ERR_NETWORK_CHANGED keep appearing?
Repeated errors may indicate an unstable connection, a frequently reconnecting network adapter, conflicting VPN or proxy settings, or incorrect network configuration. Start by checking your connection and router before trying advanced fixes.
3. Can I fix ERR_NETWORK_CHANGED without restarting my PC?
Yes. Refreshing the webpage, restarting the browser, reconnecting to Wi-Fi, clearing cached files, or flushing DNS may resolve the issue without a full computer restart. However, some network resets require restarting Windows.
4. Does this error affect both Chrome and Edge?
Yes. Both browsers can display ERR_NETWORK_CHANGED because they rely on the Windows network connection. If the error appears in both browsers, troubleshooting Windows and your network is a sensible starting point.
5. Will resetting network settings delete my personal files?
A Windows network reset does not normally delete documents, photos, or other personal files. However, it removes network adapter configurations and may require you to reconnect to Wi-Fi or reconfigure VPN and other networking software.
6. What if ERR_NETWORK_CHANGED appears only on one website?
If other websites load normally, the issue may be specific to that website, its DNS records, or a temporary server problem. Try refreshing the page, opening it in a private window, and checking again later before changing system-wide network settings.
Final Words
The ERR_NETWORK_CHANGED error in Chrome and Edge usually indicates that the browser detected an interruption or change in your network connection. Fortunately, you can often fix it by restarting your router, checking your VPN or proxy, clearing cached data, or flushing the DNS cache.
If those methods don’t work, resetting Winsock, updating your network adapter driver, or changing DNS settings may help. Save a Windows network reset for situations where simpler troubleshooting steps have failed.
Start with the simplest fix and test your connection after each change.