
Have you tried printing a document to PDF on your Windows PC but couldn’t find Microsoft Print to PDF in the list of available printers? This can be frustrating, especially when you need to save a webpage, Word document, spreadsheet, or other file as a PDF without installing additional software.
Microsoft Print to PDF is a Windows printing feature that lets you convert printable documents into PDF files. Instead of sending a document to a physical printer, you select this virtual printer and save the output as a PDF on your computer.
Sometimes, this option disappears because the Windows feature has been disabled, a printer entry has been removed, or a system component is not working correctly. Fortunately, you can usually restore it without reinstalling Windows.
In this guide, you’ll learn how to add or reinstall the Microsoft PDF printer on Windows 11 and Windows 10.
Add or Reinstall the Microsoft PDF Printer on Windows
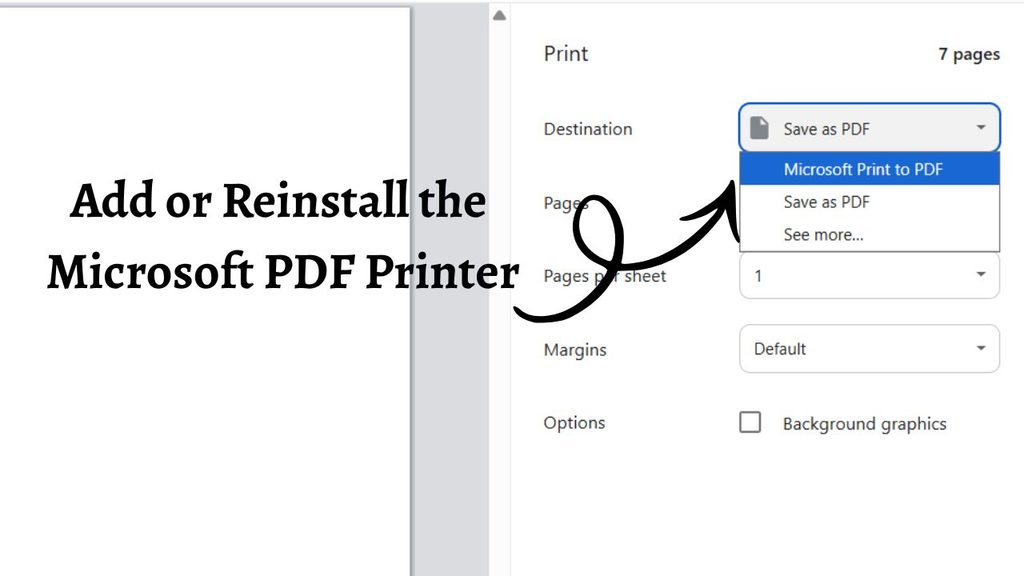
To add or reinstall Microsoft Print to PDF on Windows 11 or Windows 10, follow these steps:
- Press Windows + R, type optionalfeatures, and press Enter.
- Find Microsoft Print to PDF in the Windows Features window.
- Enable the checkbox if the feature is turned off, then click OK.
- Restart your computer if Windows requests it.
- If the feature is already enabled, turn it off, restart the PC, and enable it again.
- Open Settings > Bluetooth & devices > Printers & scanners in Windows 11, or Settings > Devices > Printers & scanners in Windows 10.
- Confirm that Microsoft Print to PDF appears in the printer list.
- If it is still missing, troubleshoot the print spooler or repair Windows system files.
These steps can restore the virtual printer in many cases without requiring third-party PDF software.
Step 1: Check Whether Microsoft Print to PDF Is Already Available
Before reinstalling anything, check whether Microsoft Print to PDF is already installed. Sometimes, the printer is available but doesn’t appear in the application you’re using.
Open a document in Notepad, Microsoft Word, or another application that supports printing. Press Ctrl + P to open the Print window.
Look through the available printer options for Microsoft Print to PDF. If you find it, select it and click Print. Windows should prompt you to choose a file name and location for the PDF.
If the printer appears and successfully creates a PDF, you don’t need to reinstall it. The issue may be specific to another application.
If the printer is missing, continue to the next step.
Navigation: Open a document > Ctrl + P > Printer selection > Microsoft Print to PDF.
Step 2: Enable Microsoft Print to PDF in Windows Features
One of the most common reasons the PDF printer disappears is that its Windows feature has been disabled. You can check and enable it through the Windows Features dialog.
Press Windows + R to open the Run dialog box. Type optionalfeatures and press Enter.
The Windows Features window will appear. Wait for the list of optional Windows components to load, then look for Microsoft Print to PDF.
If the checkbox is empty, select it and click OK. Windows will apply the change and install or enable the required component. Follow any prompts that appear.
If Windows asks you to restart the computer, save your work and restart it. Once Windows loads again, open the Print dialog in an application and check whether the PDF printer is available.
If the checkbox was already selected, the feature may be enabled but not working properly. In that case, you can try reinstalling it in the next step.
Step 3: Reinstall Microsoft Print to PDF by Turning the Feature Off and On
If Microsoft Print to PDF is enabled but missing from your printer list, toggling the Windows feature can help refresh its configuration.
Press Windows + R, enter optionalfeatures, and press Enter. Find Microsoft Print to PDF in the list.
Clear its checkbox and click OK. Wait for Windows to complete the change. If prompted, restart your computer.
After restarting, open the Windows Features dialog again using the same command. Select Microsoft Print to PDF and click OK to enable it.
Allow Windows to finish applying the changes, then restart the computer if requested.
Open a document and press Ctrl + P to check whether the printer has returned.
Important: If the option is missing entirely from Windows Features, or Windows displays an error while applying the change, don’t repeatedly toggle unrelated features. Move on to the system repair steps below.
Step 4: Check the Printer in Windows Settings
After enabling the feature, confirm that Windows recognizes the PDF printer.
In Windows 11, open Start > Settings > Bluetooth & devices > Printers & scanners.
In Windows 10, navigate to Start > Settings > Devices > Printers & scanners.
Wait for the printer list to load and look for Microsoft Print to PDF. If it appears, select it to view the available printer options.
Depending on your Windows version, you may see options for managing the printer or opening its properties. If available, open the printer queue or printer properties to check whether Windows recognizes it correctly.
If the printer is listed but documents won’t save as PDFs, test it with a simple text document. Choose Microsoft Print to PDF, click Print, and select a destination folder.
If it is missing from Settings, continue with the following steps.
Step 5: Add the Printer Manually
If the Microsoft PDF printer is missing from the printer list, Windows may let you add it manually.
Open Settings > Printers & scanners using the navigation for your version of Windows. In Windows 11, click Add device next to the option for adding a printer or scanner. In Windows 10, click Add a printer or scanner.
Wait for Windows to search for available devices. If Microsoft Print to PDF does not appear, look for the option indicating that the printer you want isn’t listed. The exact wording and location vary by Windows version.
If the Add Printer wizard offers a manual setup option, open it and check whether you can select an existing local printer port and the Microsoft Print to PDF driver.
However, Microsoft Print to PDF is a Windows feature, not an ordinary network printer. Manually adding a printer may not work if its feature or driver components are missing. If the appropriate driver isn’t available in the wizard, return to Windows Features and verify that the component is enabled before trying more advanced repairs.
Step 6: Restart the Print Spooler Service
The Print Spooler service manages printing tasks in Windows. If it stops responding, printers may disappear, remain unavailable, or fail to process print jobs.
Press Windows + R, type services.msc, and press Enter.
In the Services window, find Print Spooler. Double-click it to open its properties and check the service status.
If the service is stopped, click Start. If it is running but printing is malfunctioning, click Stop, wait a moment, and select Start again. Leave its startup type at the normal Windows configuration unless you have a specific reason to change it.
Click Apply > OK if you changed any settings.
Now open a document and try printing it to Microsoft Print to PDF again.
If the service cannot start or repeatedly stops, the issue may involve a damaged print component, a conflicting printer driver, or a Windows system problem. Continue with the next step.
Step 7: Repair Windows System Files Using SFC and DISM
Corrupted Windows system files can interfere with optional features and printing components. Windows includes two tools, System File Checker (SFC) and Deployment Image Servicing and Management (DISM), that can help repair these problems.
Open Start and search for Command Prompt. Right-click it and select Run as administrator. Approve the permission prompt if it appears.
First, enter this command and press Enter:
sfc /scannow
Wait for the scan to finish. SFC checks protected Windows system files and attempts to repair corrupted versions.
Next, run this command:
DISM /Online /Cleanup-Image /RestoreHealth
Allow the process to complete. DISM repairs the Windows component store and may need an internet connection to obtain replacement files.
When DISM finishes, run sfc /scannow once more. Restart your computer and check whether Microsoft Print to PDF is available.
These tools do not guarantee that every printer issue will be resolved, but they can help if damaged system components are responsible.
Step 8: Restore the Printer Using PowerShell
If the feature is enabled but the printer remains missing, you can check its status using Windows PowerShell. This method is more advanced, so follow the commands carefully.
Open Start, search for Windows PowerShell, right-click it, and select Run as administrator. On some Windows 11 systems, you may use an elevated Windows Terminal instead.
Enter the following command to check the feature state:
Get-WindowsOptionalFeature -Online -FeatureName Printing-PrintToPDFServices-Features
Press Enter and review the result. If the feature is disabled, you can try enabling it with:
Enable-WindowsOptionalFeature -Online -FeatureName Printing-PrintToPDFServices-Features -All
Wait for the operation to finish. If Windows requests a restart, save your work and restart the PC.
Note: The feature name and availability can vary across Windows editions or servicing configurations. If PowerShell reports that the feature name is unknown, don’t try random feature names. Return to Windows Features and verify the options available on your system.
After restarting, check the printer list and test PDF printing again.
Step 9: Install Pending Windows Updates
If Microsoft Print to PDF still doesn’t work, check whether Windows has pending updates that may address component or printing problems.
In Windows 11, open Settings > Windows Update > Check for updates.
In Windows 10, go to Settings > Update & Security > Windows Update > Check for updates.
Install applicable updates and restart your PC if required. Once the installation is complete, check Windows Features and the printer list again.
If you’re using Windows 10, remember that standard support ended on October 14, 2025. The availability of ongoing security updates depends on whether your device is eligible for an applicable support program or uses a Windows edition with a different support lifecycle.
FAQs
1. Why is Microsoft Print to PDF missing from Windows?
The feature may be disabled, its printer configuration may be damaged, or a Windows component may not be working correctly. Checking Windows Features is a good first step.
2. Is Microsoft Print to PDF available on Windows 11 and Windows 10?
Yes, Microsoft Print to PDF is available on supported Windows 11 and Windows 10 installations. The exact options can vary by edition, configuration, and system state.
3. Can I reinstall Microsoft Print to PDF without reinstalling Windows?
Yes. You can usually restore it by enabling the Windows feature, toggling it off and on, or repairing the related system components. A full Windows reinstall is rarely the first step to take.
4. Why does Microsoft Print to PDF ask me where to save the file?
That is normal behavior. The feature creates a PDF file instead of sending a document to a physical printer, so Windows asks you to choose a file name and destination.
5. Can I use Microsoft Print to PDF if my physical printer is offline?
Yes. Microsoft Print to PDF is a virtual printer and does not depend on a physical printer being connected or online. However, the Windows printing components must be working correctly.
6. What should I do if Microsoft Print to PDF is enabled but still doesn’t work?
Restart the Print Spooler service, run SFC and DISM, check for Windows updates, and verify that the printer appears in Settings. If the problem continues, look for relevant errors in Windows before attempting more extensive repairs.
Final Words
The missing Microsoft Print to PDF option can make it harder to save documents, webpages, and other files as PDFs, but you usually don’t need additional software to fix it.
Start by checking Windows Features and enabling Microsoft Print to PDF. If it is already enabled, toggle the feature off and on, confirm that the printer appears in Settings, and restart the Print Spooler service if necessary.
If those methods don’t work, SFC, DISM, PowerShell, and Windows Update provide additional troubleshooting options.
Work through the steps in order and test the printer after each major change.