
The CLOCK_WATCHDOG_TIMEOUT stop code means Windows detected that an expected clock interrupt was not received from a secondary processor within the allocated interval.
Microsoft describes the processor as potentially nonresponsive or deadlocked when this bug check occurs.
That does not automatically mean your CPU is defective. A processor can become unresponsive because of unstable BIOS settings, excessive heat, problematic drivers, memory instability, firmware issues, or another hardware-related problem.
Let’s go for its fixes!
Clock Watchdog Timeout Error on Windows 11/10
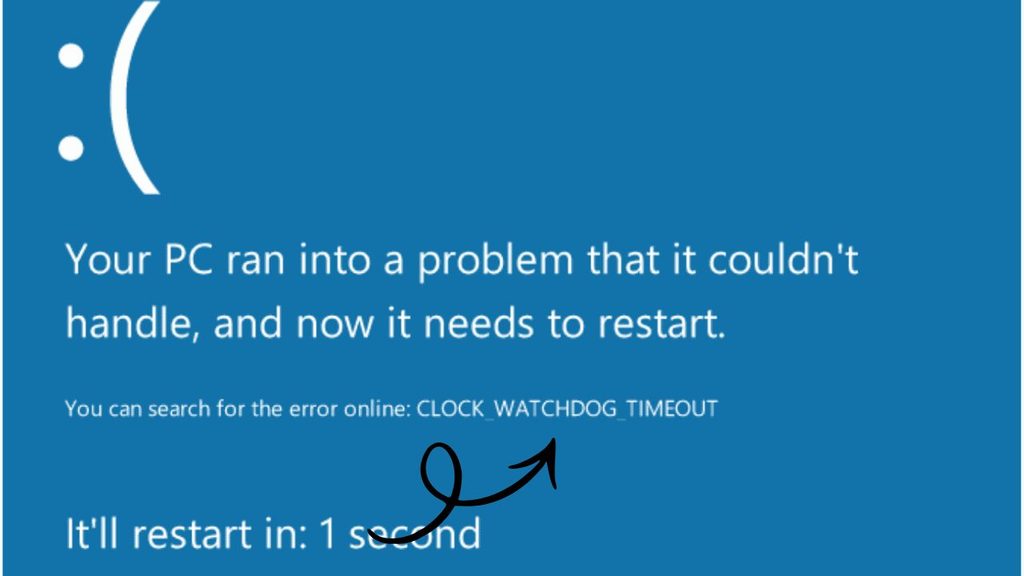
To fix the Clock Watchdog Timeout error on your Windows device:
- Restart your Windows PC and check whether the error happens again.
- Install Windows updates and the latest compatible device drivers.
- Update your BIOS or UEFI firmware using instructions from your PC or motherboard manufacturer.
- Check CPU temperatures and make sure the computer has adequate cooling.
- Run Windows Memory Diagnostic to check for possible RAM problems.
- Undo CPU overclocking or aggressive performance settings and return the processor to default settings.
- Run System File Checker and DISM to check Windows system files.
- Disconnect recently added hardware and test the PC again.
- If the blue screen continues, check crash dumps or contact the PC manufacturer for hardware-level diagnostics.
Let’s learn in detail!
1: Restart Your Computer and Check for a Repeat
The first thing to do is restart Windows normally if your PC is still able to boot. A one-time blue screen can sometimes result from a temporary system problem, so you do not want to make major configuration changes after a single occurrence.
After restarting, use your computer normally for a while and pay attention to when the error occurs. If it happens while gaming, running demanding software, starting the computer, or performing a particular task, that timing can provide an important clue.
If the error keeps returning, continue with the next steps.
2: Install Windows Updates
Microsoft regularly releases Windows updates that can address operating system problems, compatibility issues, and hardware-related bugs.
Open Settings and go to Windows Update. On Windows 11, you can use Start > Settings > Windows Update > Check for updates. On Windows 10, go to Start > Settings > Update & Security > Windows Update > Check for updates.
Install available updates and restart your PC when Windows asks you to. Also check the Optional updates area if it is available because compatible driver updates may be listed there.
Do not assume that Windows Update alone provides every driver or firmware update your PC needs. Your computer or motherboard manufacturer’s support page may provide newer chipset, BIOS, storage, or other hardware drivers.
3: Update Your BIOS or UEFI Firmware
An outdated or unstable BIOS/UEFI configuration can sometimes contribute to processor stability problems. This step deserves extra care because BIOS updates are different from ordinary Windows updates.
First, identify your exact computer or motherboard model. Then visit the manufacturer’s official support page and check whether a newer BIOS or UEFI version is available.
Follow the manufacturer’s instructions exactly. Keep the computer connected to reliable power during the update, and do not turn it off while the firmware update is running.
If your PC has never experienced the problem before and the issue started immediately after a BIOS update or hardware configuration change, check the manufacturer’s documentation for information about reverting or adjusting the affected setting.
4: Return CPU Settings to Default
If you have changed CPU overclocking, undervolting, memory overclocking, or other performance settings, temporarily return everything to the manufacturer’s default configuration.
For beginners, this is important because a computer can appear completely stable during normal tasks but crash when the processor becomes heavily loaded.
Enter your PC’s BIOS or UEFI settings, locate performance or overclocking settings, and restore the default configuration according to your motherboard manufacturer’s instructions.
After saving the changes, boot into Windows and test the computer again.
If the CLOCK_WATCHDOG_TIMEOUT error disappears, the previous performance configuration may have been contributing to system instability.
5: Check Your CPU Temperature and Cooling
A processor working under excessive thermal stress can become unstable, particularly during demanding workloads. Microsoft community troubleshooting discussions have also identified overheating as a possible factor in some CLOCK_WATCHDOG_TIMEOUT cases, although the stop code itself does not prove that overheating is the cause.
Check whether your computer becomes unusually hot before crashing. Pay attention to loud fans, sudden performance drops, frequent shutdowns, or crashes during gaming and other demanding workloads.
For a desktop PC, make sure the fans are operating correctly and that dust is not blocking airflow. For a laptop, make sure the ventilation openings are not covered while the computer is running.
If temperatures remain unusually high, consider having the cooling system inspected rather than repeatedly stressing the processor.
6: Test Your RAM
Although CLOCK_WATCHDOG_TIMEOUT specifically points toward processor synchronization, memory instability can also be involved in broader system crashes, especially when memory settings have been changed.
Windows includes Windows Memory Diagnostic, which you can access by opening Start and searching for Windows Memory Diagnostic.
Select the option to restart the computer and check for memory problems. Windows will reboot and perform a memory test before loading normally.
If the test reports memory errors, investigate the RAM modules, their configuration, and any memory overclocking settings. On a desktop, reseating RAM or testing modules individually can be useful, but follow your PC or motherboard manufacturer’s instructions if you are not comfortable working inside the computer.
7: Repair Windows System Files
Corrupted Windows system files can cause various stability problems, so it is worth checking the operating system after repeated blue screens.
Open Windows Terminal or Command Prompt as administrator. Run the System File Checker command and allow Windows to complete the scan.
You can then use the DISM repair commands to check and repair the Windows component store if necessary.
After the repairs finish, restart the PC and monitor it for further CLOCK_WATCHDOG_TIMEOUT crashes.
These commands are most useful when Windows itself has damaged or inconsistent system components. They cannot repair a physically defective processor or motherboard.
8: Update Chipset and Hardware Drivers
Your CPU does not operate independently of the rest of the platform. The chipset, motherboard firmware, storage controller, graphics hardware, and other devices all interact with Windows.
Check your computer manufacturer’s support page for your exact model. For a custom-built desktop, check the motherboard manufacturer’s support page.
Install the appropriate chipset and motherboard drivers and any other recommended updates. Avoid downloading random driver packages from unfamiliar websites.
If the problem began after installing a particular driver, consider whether rolling back that driver to an earlier stable version is appropriate.
9: Disconnect Recently Added Hardware
Think about what changed shortly before the blue screens began.
Did you install new RAM? Add a graphics card? Replace a storage drive? Connect a new PCIe device? Change CPU settings?
If the answer is yes, temporarily return the computer to its previous configuration when practical. Then test Windows again.
This is particularly useful because it can help separate a new hardware or configuration problem from an existing Windows problem.
10: Check for Crash Dumps and Get Hardware Help
If the error continues despite the previous steps, Windows crash dumps can provide additional information for someone experienced with WinDbg and Windows kernel debugging.
Microsoft’s documentation explains that the 0x101 bug check contains information about the processor that failed to respond as expected.
If you are not comfortable analyzing dump files, you do not need to become a kernel-debugging expert just to troubleshoot your PC. Save important files, record when the crashes happen, and contact your PC, motherboard, or CPU manufacturer’s support team.
Repeated CLOCK_WATCHDOG_TIMEOUT crashes that continue after returning the system to default settings deserve particular attention because the problem may involve hardware or firmware rather than Windows alone.
FAQs
What does CLOCK_WATCHDOG_TIMEOUT mean?
CLOCK_WATCHDOG_TIMEOUT, or 0x00000101, means Windows did not receive an expected clock interrupt from a secondary processor within the required interval. Microsoft describes this as an indication that the processor may have become nonresponsive or deadlocked.
Is CLOCK_WATCHDOG_TIMEOUT a CPU problem?
It can be related to the CPU, but the error does not prove that the processor itself is defective. BIOS settings, overheating, drivers, memory instability, firmware, and other hardware issues can also be involved.
Can overheating cause CLOCK_WATCHDOG_TIMEOUT?
Overheating can contribute to system instability, particularly when the processor is under heavy load. However, you should not assume temperature is the cause without checking the system’s actual thermal behavior.
Should I disable overclocking?
If your processor, RAM, or other components are overclocked or undervolted, temporarily returning them to default settings is a useful troubleshooting step. If the crashes stop afterward, the previous configuration may have been unstable.
Can updating BIOS fix CLOCK_WATCHDOG_TIMEOUT?
A BIOS or UEFI update can sometimes resolve compatibility and stability problems, but it is not guaranteed to fix every 0x101 error. Use the firmware provided for your exact motherboard or computer model.
Does reinstalling Windows fix this error?
A clean Windows installation can help determine whether the problem is software-related, but it is not the first step I would take. If the underlying problem is hardware, overheating, firmware, or unstable CPU settings, reinstalling Windows will not necessarily solve it.
Final Words
The CLOCK_WATCHDOG_TIMEOUT error on Windows 11/10 is a serious-looking blue screen, but the stop code itself is more of a clue than a diagnosis. Windows reports bug check 0x101 when an expected processor clock interrupt is not received within the required interval.
Start with the straightforward fixes: install Windows and hardware updates, return performance settings to default, check temperatures, test RAM, repair system files, and update chipset or motherboard drivers. If the error continues after those steps, focus your attention on BIOS/UEFI, hardware stability, cooling, and professional diagnostics rather than repeatedly reinstalling Windows.